3D Printing – Fabricating for a Function part 3 (Journal Entry 13)

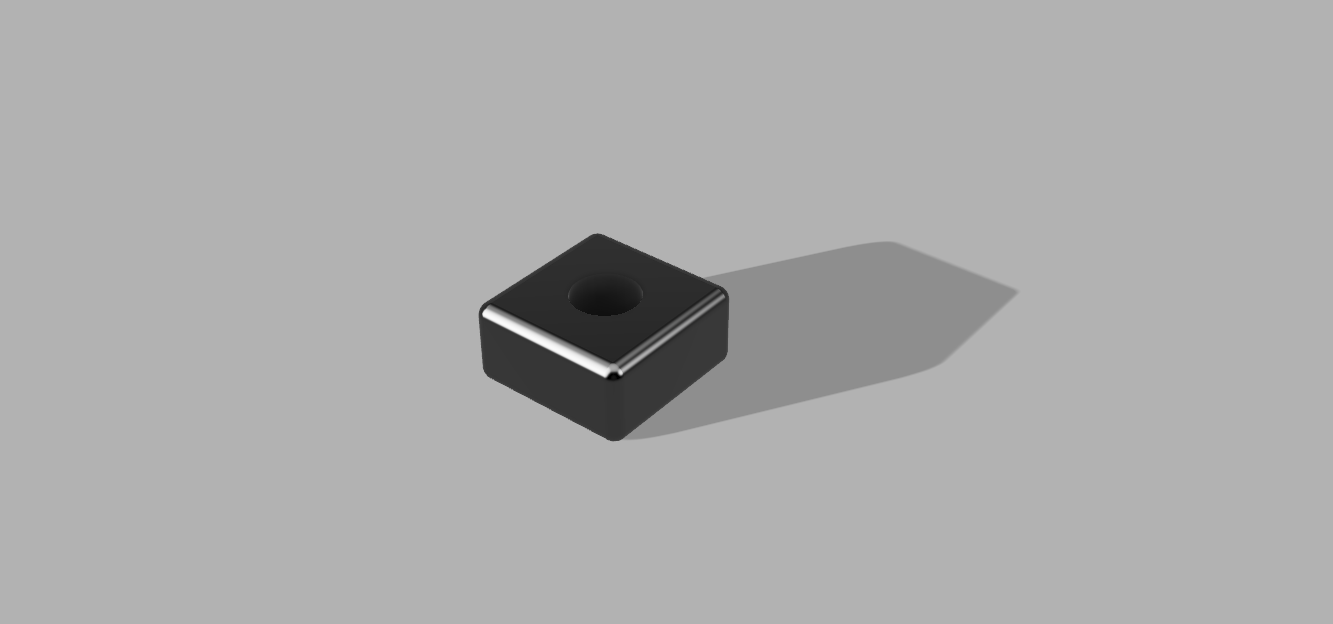
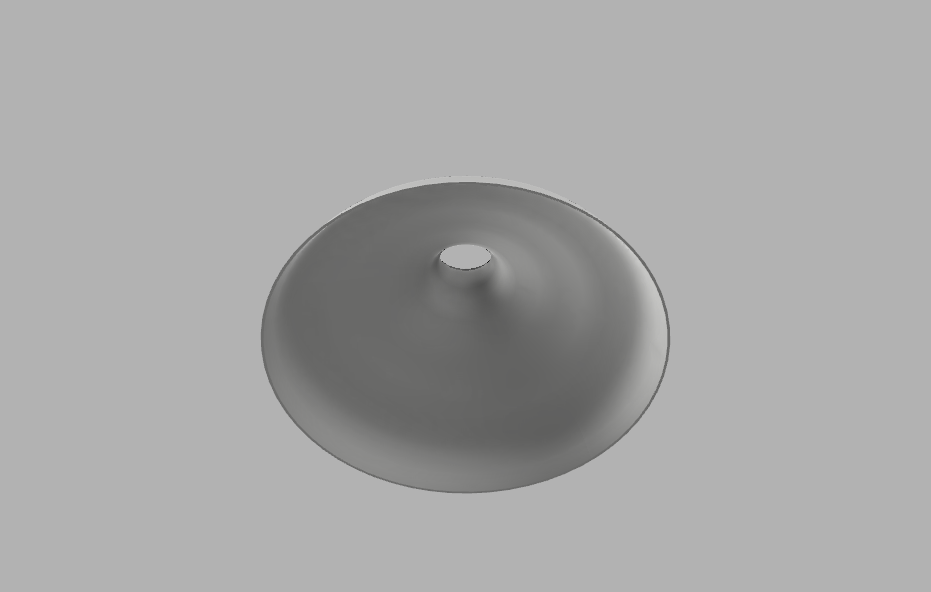
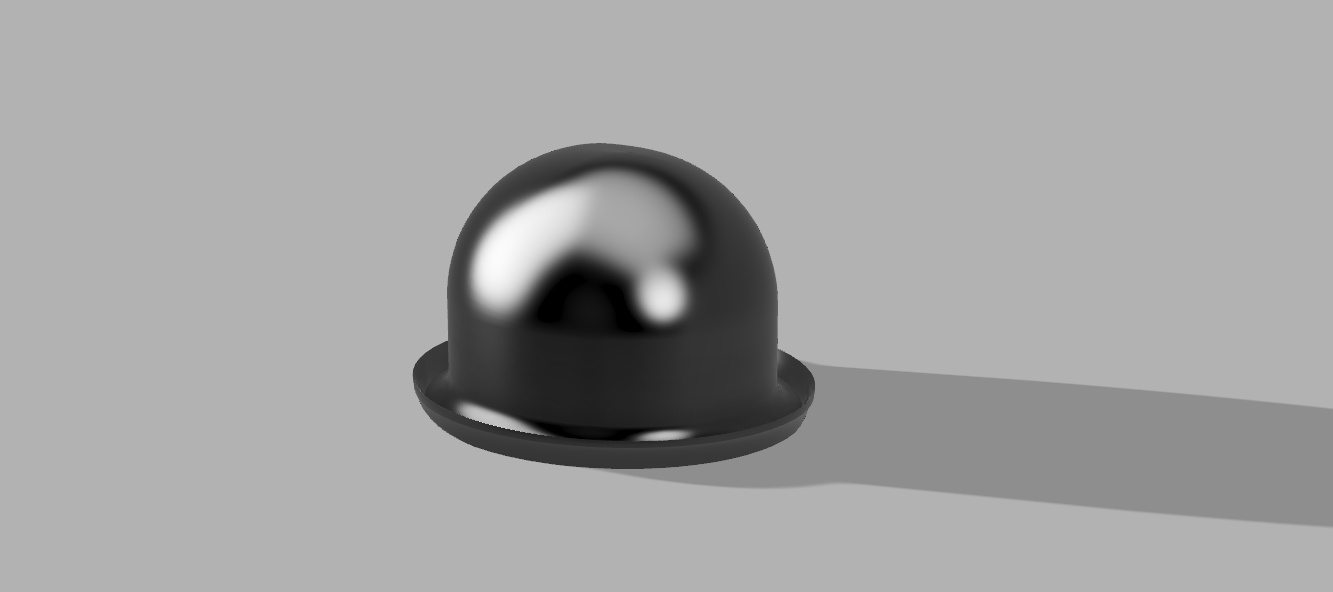
So 3D printing did not go well. In 100% honesty I waited to long to attempt to print this. At the time that I am writing this I am sitting at home in St. Petersburg FL far away from school and can’t attempt again. Long story short I had all my finals on Wednesday and my lease on my apartment also ended on Wednesday and I had no way to stay in Tallahassee and I never successfully printed my 3D model so in this post ill just talk about my process and what I learned about 3D printing which is actually more than I thought I would. So, there is a picture of my original idea at the bottom of this post, it is supposed to be a bookmark type thing that also has a holder for both a controller and controller charger.  So, the 3D modeling was fairly easy its just a couple of straight lines and one curved one for the charger but there are a couple major problems that is has that I didn’t think of until after I didn’t have time to change things. First off the bottom of the frame is 5mm high so when the videogame cases sit on top of it they will obviously be 5mm taller but not the ones further down the line that aren’t and that would just look dumb. Most bookends have a very thin slate that goes under the books that don’t actually raise the books and I’m not sure if it’s possible to 3D print something that’s that thin. In addition to that the video game cases are really really light, and the controller is much heavier so if I were to balance the controller on the other side then the holder would just flip completely over and not work anyway.

I’m still a little shaky on what exactly to set things to get a good 3D print also which undoubtably contributes to why I’ve had so much trouble printing. I know that a skirt around the print is supposed to increase your chances for success but I’m not sure exactly what it does. Also, I’m not clear as to why you need to put your 3D model through so many different software’s before you are able to print. I get that they each do different things but specifically why does mesh mixer have to be used. All it does is make the model a solid, why can’t you use Cura or Dremel to do this instead.

               As for what I learned from 3d printing it was actually a lot. Before this class all I knew was that 3d printing was a thing but didn’t understand what it was. Now I know that its basically just building something with a glue gun but in a very precise way with some fancy hardening plastic. The concept is actually not complicated at all since it’s a printer that can go upwards as well as side to side, basically just a 3D array. Thinking more about that I’m really surprised that the process of printing things is so hard. It seems like from a programing perspective it wouldn’t be that hard to have some software that could change most of the settings for you. Things like having to add stilts, how thick the walls would be, what the fill in the middle should be I feel like all could be automated. As long as the computer knows what the filament is it should know if something is going to crush under its own weight, if it needs stilts, how many and thick those stilts should be, ect. If you could figure those things out, I feel like 3D printers could actually be much more common for average people to have which I think would also change consumer goods forever being able to make your own things, or make pieces to repair things that you already have. Also, the fact that there are so many options is pretty intimidating to a lot of people. I’m sure that if you knew exactly what you are doing having all those options is great but for people learning or just most people in general just changing the basic things like the amount of detail that you need in a print is perfectly fine.

               Over all I did enjoy the 3D printing assignment as it was enough for me to actually believe that I could learn how to do this and I will be going back to the Ihub this fall when I can to see if I can properly print something. I really want to print a case for my raspberry pi. Also, I want to see if I can find a 3D model online for the pi and see if I can edit it slightly so that there is a hole in the top for a fan if I ever need one.

Virtual Reality Project (Journal Entry 12)

So this project was not a great time but we finally got it. Long story short I’m leaving school on Wednesday after class and my partner is leaving then next day so when it got assigned on Monday, we didn’t have a lot of time to di it in between finals and leaving. At first our idea was just to make a maze that you could navigate through and we did accomplish that but it too a while. We planned to meet on Tuesday and pretty much do the entire assignment in one sitting and everything was going fine. We had pretty much been developing the entire project on my computer because it was running faster and about an hour before the ihub closed we were going to transfer over the project to Johns computer so he could finish it and we would record the demo at some point the next day. Fast forward two hours later and we still could not get the files to transfer in any way. We were trying to transfer them via USB and the integrated cloud version control that is in unity but nothing was working. Eventually we just gave up and decided to do it first thing tomorrow morning on the school computers and start from scratch since we couldn’t fins any way to transfer files and we didn’t feel like we would be able to get it on the computer in the ihub to demo it anyway. So we got to the iHub at 8:00 to make sure the computer was open and to get it done before our exams on the same day. It took some trouble shooting but we eventually got the file to transfer over version control on unity.

As for the actual development of the project unity is very helpful. We were able to import assets fairly easily, get assets out and test it easily. Thanks to John we were able to get it into VR easily and at first, we were having a problem with the camera not being aligned to the controls so when John was in VR he kept waling sideways while trying to walk forward. Once we got that working it was fairly easy. Almost everything that we used in the maze was imported from something that wasn’t the standard assets, John should have the list of assets that we used. Its hard to see in the video but the demons at the beginning are animated and move when you boot up that game. The giant mountain is its whole set of assets and the sand walls around the perimeter are also their own asset set. We wanted to make the maze bigger, like our original idea was huge with multiple levels but it didn’t pan out because of all the time we wasted just trying to move files to another computer but this assignment was really interesting and fun overall.

Also at the bottom there is a picture of the demons if you couldn’t see them

Partners post: https://siteaddress.video.blog/2019/08/02/virtual-reality-project-journal-entry-12/

Robotics Project (Journal Entry 11)…?

So, this project has been a bitch and a half. I want to create a smart mirror, like the ones I’m sure you’ve seen online, that is also an Alexa smart device. I figured that this would pose some challenges but overall pretty easy considering so many people do it and I have just run into all kinds of problems. First off before this I didn’t have a speaker, microphone, or external keyboard so I went out and bought them considering I wanted to build this anyway and could use it for as long as I want.   After I got everything the first problem that I was having was with the USB speaker and microphone. For the longest time I was getting an error where I could test the microphone and speaker one time and then if I wanted to use them again it would just say that the device is busy. I had trouble with this for so long I wiped my SD card probably 5 or 6 different times re-downloading the software both from lucas.help and from the raspberry pi website and nothing helped. At one point I considered just making something else just for the interest of this project and working on this later and I actually got OSMC running on my pi and then deleted it because I thought it was too easy and a cop out.

Today I wiped the SD card again, went through the same process I had been, created the .asoundrc file like you see in the picture below and for whatever reason the speaker and mic work completely fine (ignoring the fact that it’s a cheap speaker and mic so the sound quality is carap). After that I continued with the google assistant instillation because I looked up the amazon one and it’s way more confusing and hard and right now I just need to get this done. Got about 4/5 the way through the instillation and came to a bug that I can’t solve. When it comes to the smart mirror the software that I’ve found on GitHub can’t install due to something having to do with electron not being the right version. So, what i posted on canvas is as far as I got. By hell or high water, I will get this assistant and smart mirror working just not before the end of this class because I just don’t have the time between my exams, finishing a large semester long project for another class, and moving out of my apartment. I’ve probably spent collectively 16-20 hours on this trying to debug things and I just can’t spare any more time.

               Near the end here I want to say that even though I pretty much failed at accomplishing what I wanted to do I loved this assignment. I’ve been meaning to start making things with raspberry pi for a while now and just haven’t found the time and this class gave the reason to start. I have so many ideas for things that I want to make, some of them generic like the smart mirror, a pi hole, and a retro pi machine.  Unfortunately living in my current apartment I don’t have access to my router so I wont be able to do a pi hole for a while but I can do the smart mirror and retro pi soon and use an old Xbox controller that I have. Also I want to strap a pi with a camera onto a drone and run object identification software to do tings like follow cars and possibly fly it over the water and see if it can identify fish or sharks near the coast. I really don’t have any real goal or reason for this other then its cool. This was my favorite project in this class and I wish we could have had more time for it.

Fabricating for a function pt.2

So, for this model it’s fairly simple it’s just a bookmark with an extra limp on the side to hold the charging cord. The reason that the part that has to hold the charging cord sticks out from the main wall is the charging cable that is going to go in it has the large bulge on it that will have to fit in-between the main wall and the part that holds the charger. The bottom also has longer stilts on the side that the controller will sit because I expect that the controller will weigh a lot more then the disks and boxes on the other side. I might need to add some stilts the hold the controller upright but I’m not sure yet. I’m afraid that the controller won’t stay upright on its own while connected to the charger. Also, I want the controller to be able to lean on the bookmark without being connected to the charger. The entire structure stands 5 in tall which is just a little shorter than the cases that it will be holding up. The boarder and X in the middle are all .5 in wide and 5 mm thick. The base in one side is only one inch long and on the other side it’s 3 in long and both are 5 mm thick. The height of the curve that holds the cord is 20 mm.

Fabricating for a Function

On my bookshelf every time I need to get a video game or a textbook, I end up knocking the shelf and everything falls all over the place. You can see in the video that there isn’t anything on the shelf but there usually is a ton of books, markers, and binders I’m just in the process of moving right now.  Also, I have a charging cable for my Xbox controller that always falls behind the bookshelf of just hangs over the side and looks ugly.  What I want to do is have some sort of bookend that on the other side of it will have little hooks to hold a controller and some sort of holder that will prevent the charger form falling behind the shelf. I also want to be able to have the controller sitting there charging without having to remove the controller or the charger from their places. (The video is uploaded on canvas)

Fusion 360

The tutorial shape, lamp shade, bowler hat, and sunglasses all have very different challenges. The tutorial shape was easy honestly and a good introductory shape. It was easy and introduced a lot of helpful techniques but did fall short of others, but the lamp shade made up for it by introducing the creating things from drawing are revolving. The bowler had was hard mainly because it is just an awkward shape to start with. The curves at the bottom and the fact that it starts as rising in a straight line and then curves inward made it even harder. The fillet tool was probably my most used tool, I think I used it in every individual piece at some point. By far the hardest shape was the glasses. The smaller parts around the nose and brim are very hard to get right. The fillet tool doesn’t work well when the size of the object is really small which made it even harder to create some fine details. I tries to use the boundary fill tool to fill in the glass in between the rim but for some reason I couldn’t get it to work. Also, after doing the tutorial object I could barely get the rendering tools to work. I think my computer just doesn’t have the GPU power to do it on a large object or with any amount of complex texture. It worked slightly and slowly on the lamp shade and I was able to change the colors on the objects but not the textures that it showed. Overall, I actually think that fusion 360 and freeCAD are both good for separate things. If I was going to make one singular object with only straight lines and no moving parts I would probably use freeCAD to make it but if you needed any curves or moving parts I would use fusion 360. I can see how fusion 360 is way more powerful and useful to a more experienced person but I could get by with freeCAD.

3D modeling freeCAD

The first image is of the tutorial object that we were assigned to create. I actually found it the hardest object that we had to create mainly due to all the weird functionality that was needed to complete it and just not being familiar with the program but I guess all the weird nice things that the tutorial makes you do makes it a good tutorial. The next two images are of my desk cable holder and the picture of the desk it the last image. You would be able to put the cable in diagonally from the top and after that the wire would straighten out not being able to get free and it wire can’t fall through because the little lip near the front makes the hole to small for the charger to fit through. There is also a little extra lip near the bottom to more safely secure it to the desk. The last two images are of the pieces that I made that can join to each other. The one piece pretty much does all the work and the other just snaps in. The edges are sloped so that it will snap in easily and there is one side with a wall to hold the object in place and the other is missing a wall to easily remove it.     

3D modeling

This assignment while still tedious was much less frustrating then app inventor. As expected at first the shapes were very easy with the PVC pipe and egg but they did get harder as they went on. The main problem that I had with modeling things was when you had to any amount of fine detail on something. Things like the little square on the bottom of the floppy disk and the details on the glasses were particularly hard with the grid system. There were many times where I need something to be about half a block left of right in order to fit perfectly.

At one point while working on the glasses I rand into a problem when I was adjusted a shape that I had heavily edited and as I was trying to change its height and I think tinker cad had a stroke and my entire screen went black. After a couple seconds just my browser window was black, so I closed the window and opened it again thinking that I had lost all my progress but fortunately tinker cad saved most of it and I didn’t have to start completely over. I know we’ve been warned about how terrible the next part is but I’m excited to start working on the next part of 3d modeling.

Entry 3

What’s gunna work. TEAM WORK!

So for in our project we have decided to do a branching story where the user can make their own decisions with a short mini game or two woven into the story. Our group has been kind of organically divided into groups that each do the main programming, story writing, and the art for the app. I have been working on the actual app development. We had about half of the app done until we ran into a problem with app inventor where it only allows you to have a max of 10 pages per app. Because we were using one page per decision, we hit 1 pages pretty quickly and now we have to find some sort of work around to implement the other pages that we need. We planned to have around 24 pages so we are trying to see if maybe we can use one page for more than one decision. We found a video online that might help but we haven’t tried to implement it yet. I’m pretty confident we can figure this out and make the entire app that we originally planned but will see. Below is a picture of our second group meeting, I’m sure that you’ve seen it before because I’m guessing that my entire group used the same picture.

Entry 2

For this assignment in app inventor I believe I did what was done in class implementing a counter and moving to the next page, I also attempted to write a program that finds a random number and then finds that numbers Fibonacci number (A Fibonacci number is a number where its sum is the sum of the previous two numbers in the sequence). It was a little annoying that you must use global variables and I couldn’t figure out to take in input from the user instead of using a random number. The reason the random number is only from 0 to 50 is because calculating Fibonacci numbers past that would probably be to computationally intensive for this little app inventor emulator to do. The actual logic for the Fibonacci number I looked up online and just implemented it in app invertor logic blocks myself. The for-loop structure is way more complicated then it needs to be for these little Lego building block designs that app inventor uses. Also, I spent about 2 hours trying to get the output to be on the same line instead of being formatted like

Fibonacci number

Blank

Is

Blank

You would think that this would be easy to do but I can’t figure it out. Getting the emulator running was it’s worn problem every time I had to use this because every time I wanted to work on the assignment I would have to go through an entire process just to get it working and I think I ended up spending more time setting up the emulator each time as I did making new things in the app and in the end I couldn’t get it to work anymore so that’s why I included a screenshot of the emulator loading in new blocks because that’s what I’ve been looking at trying to fix for the last four hours. I would have rather made my own app from scratch but i realize that’s not possible in this class. This app inventor software I will be glad to get as far away form as possible.